i have a spray card for the colour it looks nice, the strip on the side was black with sd 427 instead of sd 396, its a dealer car so im not sure if it was a factory black strip, good question , but the beaumont chrome between the tail lights is painted black instead of white like my other 68 sd cars, i will post some pictures in the next couple weeks.
Heres my build sheet, I deleted the ser no thats why it disappeared for a bit. Found the original protectoplate, owners manual etc. Car was transferred from Kalke to an Edmonton dealer before it sold. Does anyone know if the protecto plates were stamped with the owners name only on special ordered cars, or were they all stamped out for the buyer on spec ?
I do not know how to post pictures. I did just post an avatar as shown above. That is a 1968 photo that I scanned in. I have pictures all over my computer however I have no idea how to upload them. I probably have a couple of hundred of my restoration so far. I even have trouble finding them in my own computer although once I fool around enough they are all there. I need simple, simple, simple instructions on how to do this and what is simple to one man is not necessarily simple to me. I did send three pictures of this car to someone and I have no idea how I did it except that he said he received them. I noticed some people have large pictures of what they are doing and I would do same if I could. Even the most basic instructions are not alway simple enough for people like me however if I do get proper instructions I could very likely bore everyone with the pictures I do have.
Heres my build sheet, I deleted the ser no thats why it disappeared for a bit. Found the original protectoplate, owners manual etc. Car was transferred from Kalke to an Edmonton dealer before it sold. Does anyone know if the protecto plates were stamped with the owners name only on special ordered cars, or were they all stamped out for the buyer on spec ?
That is a 1968 photo that I scanned in . I have pictures all over my computer however I have no idea how to upload them. I probably have a couple of hundred of my restoration so far. I even have trouble finding them in my own computer
I noticed some people have large pictures of what they are doing and I would do same if I could. Even the most basic instructions are not alway simple enough for people like me however if I do get proper instructions I could very likely bore everyone with the pictures I do have.
If you can load your Avatar you can upload to a thread...
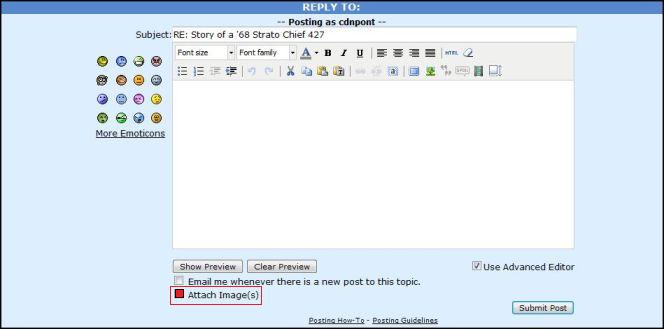
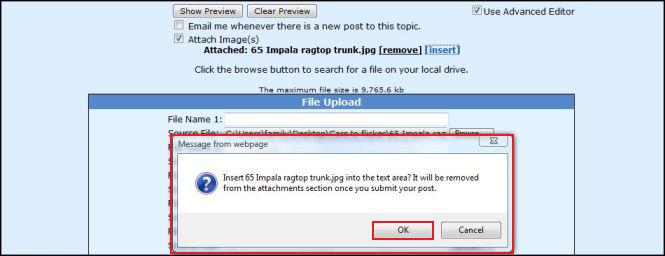
Page one, is what the page, looks like when you REPLY I pointed out the section than shows you where to upload......
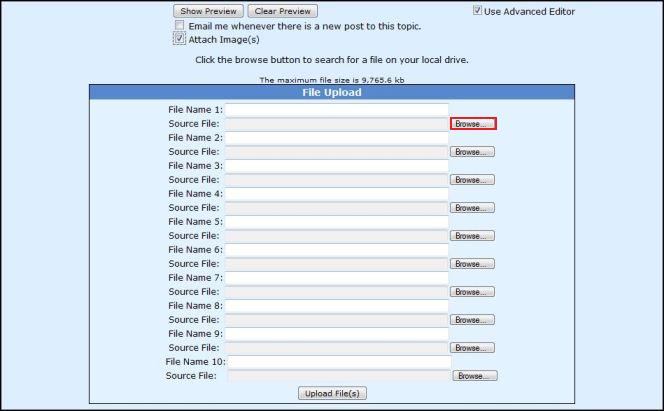
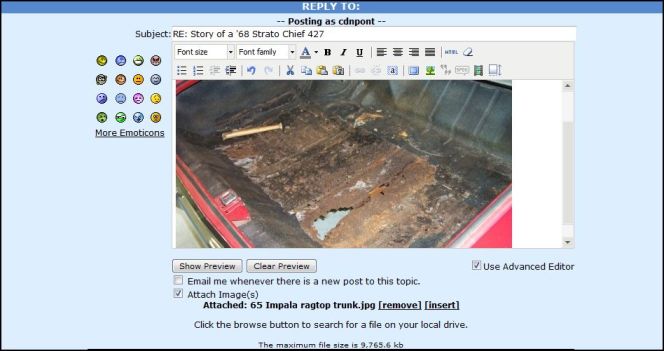
Page 2 shows what the section looks like if you post ONE picture... Once you get the hang of posting one, you can post up to 10 at a time TRY IT OUT Carl
Here's a simple Visual step by step guide to posting a single picture in a reply.
Click Reply...
Click on the "Attach Images"box...
Click on the "Brouse" button in the file upload window....
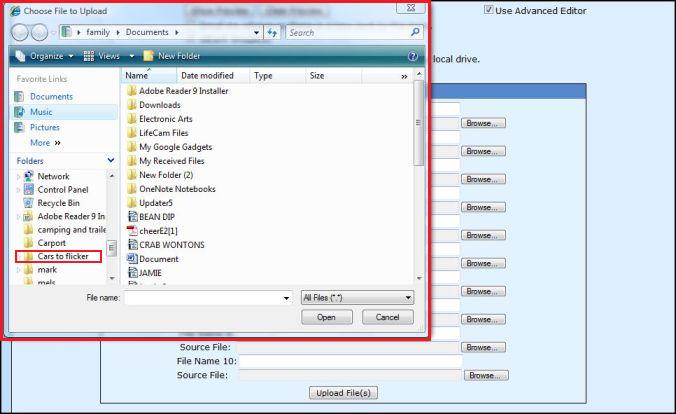
Your local drive search window will come up. Find the location on your PC of your picture files, I keep most of mine in "Cars to flickr". Click on your known location when found...
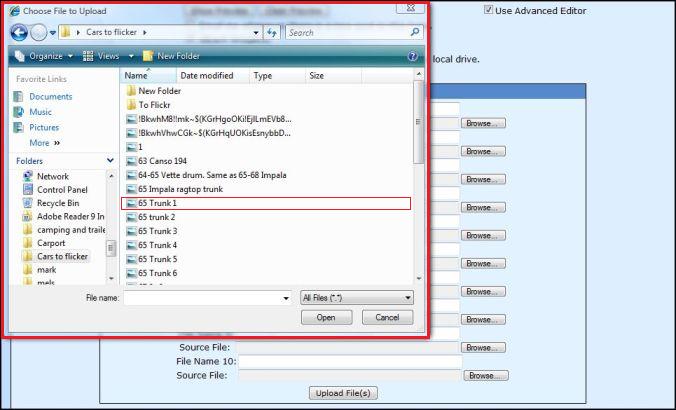
The file location appears. Choose a picture, and double click on the file you want to upload, or click once on the file, then click the "Open" button...
The file you chose is inserted into a file upload box...
Click the "Upload Files" button at the bottom....
File transfers. Upload complete, wait for screen to fade back to normal... Click "Insert"
Popup appears, click "Ok" if ready to insert a single picture...
Your picture appears in the body of your message....
Click on "Submit" when your message is complete.
Cheers, Mark
-- Edited by cdnpont on Monday 1st of February 2010 10:58:36 AM
__________________
65 Laurentian post, 67 Grande Parisienne 4 door HT.
I'll try this again. I didn't notice you had advanced editor on and I hadn't names my pictures nor exactly where they are on my computer. I think I messed this up.
I certainly messed that up. Maybe I tried to many at once. I wasn't really very good at following instructions however I may try again. Should I do them separately rather than all at once. Doug.
That's awesome. If you decide to go with a different wheel, let me know. My dad's Strato Chief had a similar set of slotted wheels and I'd love to have a set.
I cheated on those pictures that show the car like new; it is new in those pictures as they are 41 years old and I scanned them into my computer. The car came with green wheels and hubcaps and that is how it will be when its back on the street. The only difference is I will likely install the largest redline tires I can get on 14" wheels. I may have one of those slotted front wheels around and if I find it you can have it. According to the letter I received from GM when they documented the car there were 5 cars made with the 427-385. I have seen two of the other four, both green and both automatics.
Based on what Doug said about this car and his plans, I made up a picture of what it will look like. First I joined 2 pages out of the brochure. That is not always an easy task with pages printed separately and then stapled. I played around with redlines, made the interior black, correctly positioned a legit 427 Pontiac badge. I created a rear antenna, scaled it and placed it as best I could.
Voila.
-- Edited by 73SC on Wednesday 3rd of February 2010 01:47:20 AM
__________________
67 Chevelle Malibu Sport Coupe, Oshawa-built 250 PG never disturbed.
In garage, 296 cid inline six & TH350...
Cam, Toronto.
I don't judge a man by how far he's fallen, but by how far back he bounces - Patton