I started this first post last fall in October when my Corvette was acting up after a summer of driving it with three hose failures. It was written in October 2020 so keep that in mind when reading time lines.
I decided to go in for the coil and ICM on my LT1 which was backfiring and being fussy when I parked it in the garage last month.(Sept. 2020) I assembled the parts I thought I may need this week (October 2020) . GM parts for ICM and Coil and a Summit optispark. Tonight its coil and ICM. First off I'm a Finance and Accounting professional, backyard mechanics is something I picked up along the way, so I am methodical and like to research jobs first. I usually start at the FSM then look to online tutorials and you tube videos and forums. I couldn't find anything really good on line so I decided to write this up here. I studied this for about 20 minutes last night to plan my work. As a desk jockey I do wear my blue latex gloves which usally garners me a lot of jibes. I also like a clean and organized work area with as little theatrics as possible. I kept the garage door closed to discourage visitors and ran my heater and it was darn nice.
The engine is a 1993 LT1 in my Corvette and I suspect that this will look pretty much the same for Camaro's, Firebirds, Impala SS and Roadmasters and Fleetwoods through to 96 IIRC.
The coil and ICM are packaged as a unit just under my trouble light and behind that PS Fluid Resorvoir bolted to the head on the front of the engine. That resorvoir has to come out of the way and it also shares a stud with the coil assembly mounting bracket. It's not that bad, two bolts, one is easily seen from top but second is deep down low on engine and you have to feel for it and use a deep 9/16 socket and extension.You can find that bolt by reaching under resorvoir from front and pinpointing the bolt head with a finger. Once you get those the resorvoir manouvers out of the way. Resist unhooking any hoses, they all move away. Lots of connectors to undo from the coil and harness to give access and help getting the assembly out.
The above shows the coil once you get the resorvoir out of the way, that stud on the right is the common mounting point for coil and resorvoir. Next get the connectors off then go for the stud. I started it with a 9/16 box wrench and a slight tap with my ball peen hammer then finished with a 9/16 socket short extension and ratchet. After that I went for the other bolt which is covered by that harness and hose. I had to use my 15" 1/2" Craftsman breaker bar with a socket and reducer then finished with ratchet.
If you have unplugged all the harness connectors you can manouver the coil and ICM assembly out and leave this gapping hole on the right front head.
You will be left with your prize in you hand below.
Next is disassemble the unit because you will need to reuse the heat sink and bracket. As a factory piece the coil is riveted to the bracket and I'll have to dremel that out tomorrow, it was close to 10:30 and dog walking time when I got it all out and I didn't want to fire up that tool. BTW I went out to start the job at 9:15 so it took me about an hour. I cleaned the heat sink after taking ICM off. It will be ready for a new coating of Thermal Grease which is esential for the installation.
When the ICM and coil replacement did not cure my backfiring and rough running engine I knew I was going to have to go in for the optispark. It was almost November at this point so I decided to cover up the car and wait until spring to get it in order. I spent the winter researching the Optispark issue and sourcing parts that would be needed for the job. This job is releavant for this forum because the repair will be the same for all LT1 equipped cars which Include Firebird, then of course Camaro, Cadillac Fleetwood, Buick Roadmaster and Chevrolet Caprice and Impala SS.
The first disappointing thing I found out was that General Motors had discontinued supplying the Optispark. This meant that an aftermarket unit was thr only option. My research showed a series of nightmares with aftermarket parts and most advice was to go with an MSD Opti. This turned out to be a $700 + USD part. I don't consider myself cheap but reading reviews proved that these things are very unreliable out of the box. I did more digging and finally settled on a Summit Racing branded Optispark PN # SUM-8950060 for $239 USD. It had decent reviews and I have come to trust Summit branded parts over the years, I have experienced good performamce and good value.
I also thought that since three burst radiatior/heater hoses likely did the Opti in I had better get all new hoses underhood. Again a disappointing series of discontinued parts. These hoses are all formed and many have T's in them , they would be almost impossible to recreate. Luckily I found a complete kit at Davies Corvette in Florida just after Christmas. It was costly at close to $400 landed at my door but well worth the peace of mind. Each hose was labeled with the PN and it's location, very impressed by this product.
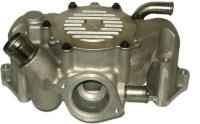
Next, believe it or not the water pump has to be removed to get the Optispark off so I figured what the heck I'll put on a new one. Again discontinued by GM but the one I got is a Gates and I'd be surprised if Gates wasn't the OEM part, looks absolutely identical.
I also decided to get a new thermostat housing and thermostat and a new serpentine belt. The thermostat housing is pretty neat as it has a bleeder screw on it which really helps when refilling coolant. Also purchased sundry gaskets and locktight, antisieze, pipe thread compound, gasket sealer, throttle body cleaner etc... Shop rags also essential.
The job can really be broken down into 5 steps:
1. Drain the coolant
2. Remove air intake and throttle body
3. Remove Water Pump
4. Remove Harmonic Balancer
5. Remove Opti Spark.
In my case I opted to replace every underhood hose and the serpentine belt which are worthwhile but add a bit of time to the overall process. Total tear down time with hoses and belt was 4 hours. Keep in mind I am not a trained mechanic rather I am a Finance Professional who has picked up auto mechamics throughout my life. The point of this being, If I can do this pretty much any car guy can. Because of my formal Finance and Accounting training I find that I rely on books and process when doing jobs like this so I plan well and reserach , refer to FSM and other on line resources. I also keep my work area clean and tidy, tools are not thrown around and I wear the dreadeed blue latex gloves. Taking time and enjoyig the task at hand is my goal, never force anything and be patient. My right hand man in this venture is 65camino, moral support, technical support and more often than not wrenching.
We put the car up on ramps for two reasons, one was to drain radiator and get access to rad hoses and secondly to raise the engine up to a comfortable working height, a Corvette is low. This may not be a consideration for the car you work on but raising it to drain the coolant is helpful.
Once coolant is draining you can go for the air intake and throttle body. Throttle body has coolant hoses going through it so beware. 4 bolts and throttle body is off.
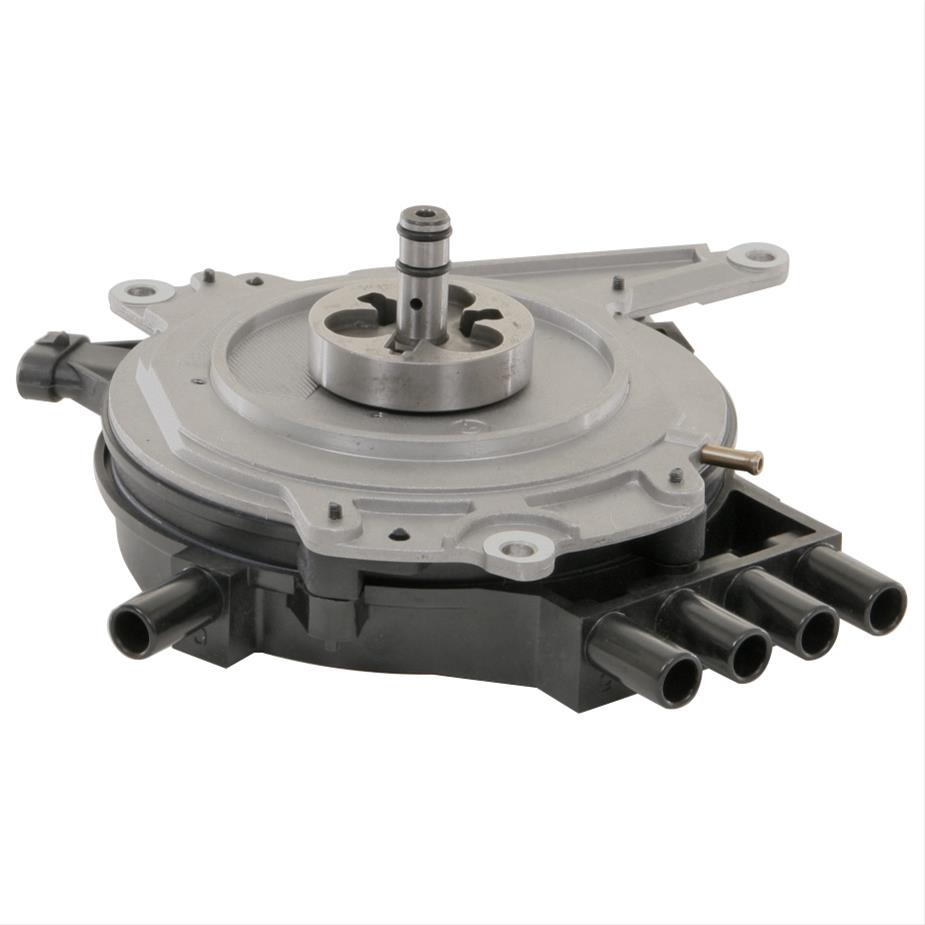
Next is the water pump, you are going to need an assortment of wobbles and U joint sockets plus extensions. There are 6 bolts on the water pump, 5 are fairly easy and the middle one drivers side hides behind a pulley. You can get it with the wobble and extension and u-joint sockets, slide along side pulley on and angle and it will come. Water pump is direct drive and there is a sleeve that runs from pump gear to engine gear, very important to not drop or lose this piece. There is also an O ring that will be replaced on the gear shaft towards timing cover, its a seal and comes with water pump. I'd suggest replacing that O ring even if you are reusing the pump, mine was brittle and probbaly not doing its job anymore.
Next photo does show water pump gear shaft and that's where you need to put that O ring seal. On the sleeve that connects the pump and engine there is a scribed line on one end, that goes towards the engine.
The above photo also shows the Harmonic balancer off. This engine has a two piece balancer which comes off a shaft with three bolts. I understand from GM mechanics the correct procedure is to remove the bolts and raise the engine to get enough clearance for a puller. Obviously I am not that adventurous so knowing my Opti was toast I walked the balancer off with equal pressure from a good pry bar and a dead blow hammer tapping on three sided in between pry bar use. This was done very gingerly but it worked like a charm as you can see the balancer resting on the steering rack. I took this opportunity to clean up balancer and clean rust off the mounting points, this made assemble a snap.
Next is the Optispark removal, that's three bolts all accessible, Take it off first then label wires and remove them. The Optispark is labeled with firing order so you really can not screw it up but Corvette is so tight I just labeled the wires for position on unit. Here's a shot of everything removed.
The Optispark has locating tabs on the drive shaft so there is no way to get it on wrong. Put the wires on before bolting it back up on the engine. Reassemble the parts. Important, get the torque specs for your engine, I noticed the Corvette was a bit different from the other LT1's on the balancer spec. I made sure to properly torque Balancer, 77 ft lbs., Water Pump, 30 ft lbs., Throttle body 19 ft lbs. and Opti 100 inch ibs. Here's what my work table looked like just before reassembly.
The car fired up and runs like a gorilla in heat, problem seems to be solved.
Hope this is helpful to anyone trying this job and always PM me if you have any questions, I'd be happy to share my experience.
-- Edited by 73SC on Thursday 20th of May 2021 12:20:48 PM


![1990-1991 C4 Corvette Engine Cooling System Rubber Hose Set [L98 with KC4], Heater - Amazon Canada](https://images-na.ssl-images-amazon.com/images/I/51yhMpBgxLL._AC_SY355_.jpg)